

Quick Summary
To paint wooden letters for a nursery, sand the raw wood lightly, wipe away the dust, and apply a thin water-based primer. Then paint with acrylic or craft paint in a matte or satin finish, using a foam brush for the main coverage and a fine brush for the edges. Once dry, seal the letters and let them cure fully before hanging.
- Sand raw wood with fine-grit sandpaper, around 220 grit, so the paint grips well.
- Choose acrylic or craft paint labeled for wood, with a matte or satin finish for a soft look.
- Apply one thin coat of water-based primer labeled for wood before painting.
- Use a foam brush for the main coverage and a fine brush to clean up the edges.
- Allow paint to dry to the touch, then wait several days for it to fully cure before hanging.
Table of Contents
- What You Need to Paint Wooden Letters for a Nursery
- Choosing the Best Paint for Wooden Letters
- Preparing Unfinished Wood Letters Before Painting
- How to Paint Letters on Wood Without a Stencil
- How to Paint Letters on Wood With Stencils
- Painting Wooden Letters Ideas for a Nursery Theme
- Sealing, Drying and Hanging Your Painted Nursery Letters
- Frequently Asked Questions
7 Steps to Paint Wooden Letters for a Nursery
Last Updated: November 8, 2026
What You Need to Paint Wooden Letters for a Nursery
Painting wooden letters for a nursery is one of the most rewarding DIY projects you can take on. Most of what you need is simple, and you probably already have some of it at home. Whether you want a soft pastel name or a bold, bright look, the basics stay the same.

Here is a short list of what to gather before you begin:
- Unfinished wooden letters, such as Baltic birch letters in your chosen font
- Acrylic or craft paint in your chosen colors
- A foam brush and a fine paintbrush for edges and details
- A pencil and eraser for light guide marks
- Wax paper or a scrap board to work on
- A clear sealer or finish for protection
Unfinished Baltic birch letters make a smooth painting surface. You can find them in assorted fonts, including Unfinished Wooden Wall Letters - Baltic Birch Wood Letters - Assorted Fonts, which is a good starting point for a nursery name.

Choosing the Best Paint for Wooden Letters
Acrylic and craft paints work best on wood letters. They dry quickly, stay flexible, and clean up with water. Many parents pick a matte or satin finish for a nursery because it looks soft and does not reflect light harshly.
Look for paint labeled for wood or multi-surface use. Test a small spot on a scrap piece first. Check how the color looks once it dries, since wet paint often appears darker. A thin, even coat is easier to get right than one thick coat.
For a quick picker, here is how common paint types compare for this project:
| Paint Type | Drying Time | Best For | Finish |
|---|---|---|---|
| Acrylic craft paint | 30 minutes to 1 hour | Most nursery letters | Matte or satin |
| Multi-surface acrylic | 1 to 2 hours | Smooth, even coverage | Satin |
| Spray paint | 15 to 30 minutes | Large, even color | Varies |
Preparing Unfinished Wood Letters Before Painting
Good prep makes the paint look much better, and the right prep depends on what your letters are made of.
Raw wood (like Baltic birch): Wipe each letter with a dry cloth to remove dust. Lightly sand the face and edges with fine-grit sandpaper (around 220 grit) so the paint grips well. Wipe away the sanding dust with a tack cloth or a barely damp cloth, then let the letter dry completely. Raw wood is porous, so a thin coat of primer helps the paint go on evenly and reduces the number of color coats you need. A water-based primer labeled for wood is a good choice for a nursery because it cleans up with water and has less odor.
Primer choice: For nursery projects, look for a low-odor, water-based primer labeled for wood or multi-surface use. Apply one thin coat, let it dry according to the label, and sand very lightly if you feel any roughness before painting.
Many people skip prep and then wonder why the paint looks patchy or peels at the edges. A few minutes of sanding, dust removal, and priming saves a lot of touch-up work later.
Watch out: Sanding dust and primer fumes are best kept away from the nursery, do your prep in a well-ventilated space.
How to Paint Letters on Wood Without a Stencil
Painting freehand is simple and gives a warm, handmade look. Start with a pencil and draw a light guideline on the letter if you want a neat edge. You can also skip the pencil and paint freely for a softer style.
Load a foam brush with a small amount of paint. Work from the center of the letter outward. Use light strokes and let each coat dry before adding another.
Use your fine brush to clean up the edges. Small, slow strokes give you the cleanest lines. If a line wobbles, wait for the paint to dry, then gently fix it with the paint in the same color.
How to Paint Letters on Wood With Stencils
Lift the stencil straight up as soon as you finish each section. Let it dry fully before moving on. This step is where many beginners rush, and smudges often follow.
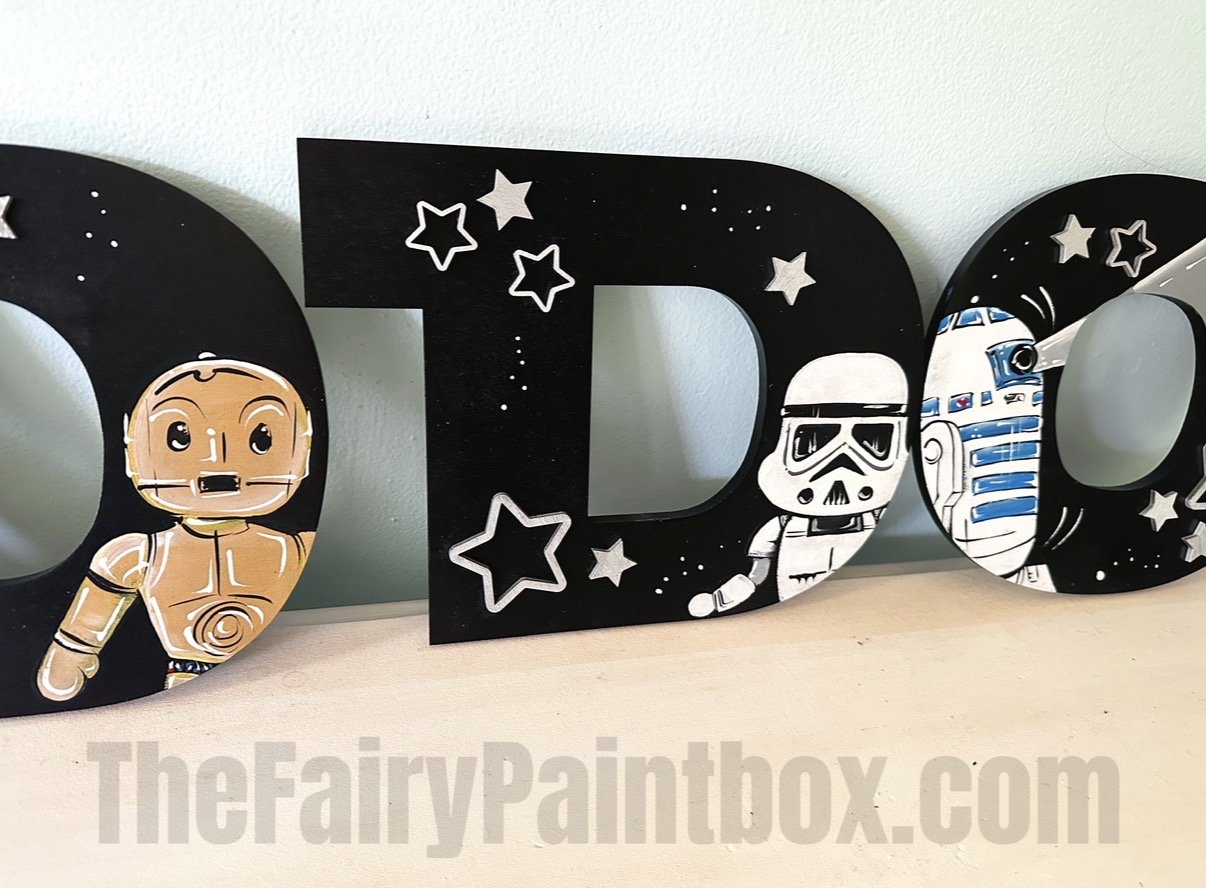
Stencils also work well for patterns like dots and stripes. Keep your color palette to two or three shades so the letters look cohesive on the wall.
Painting Wooden Letters Ideas for a Nursery Theme
Choosing a theme makes the letters feel like part of the room. A soft woodland palette of sage, cream, and warm brown fits a calm, natural nursery. A bright rainbow palette suits a playful space.
Many parents match the letters to the bedding, the wall color, or a favorite book. Try painting one or two letters in an accent color and the rest in a neutral tone for a balanced look.
If you want a ready-made option instead of painting yourself, you can browse Hand Painted Wooden Letters Custom Nursery Decor Letters and Custom Baby Name Signs for Nursery Decor for inspiration.

Sealing, Drying and Hanging Your Painted Nursery Letters
Drying and curing are not the same thing, and knowing the difference helps you avoid a tacky or damaged finish. Most acrylic and craft paints feel dry to the touch in about 30 minutes to an hour, and you can usually apply a second coat after that. But "dry to the touch" does not mean the paint has fully cured. Full cure, when the paint has hardened completely and is safe for normal handling, often takes several days to a week or more, depending on the paint, humidity, and temperature. Check your paint label for the manufacturer's recoat and cure times, and give the letters extra time in a humid room.
Once the paint is fully dry, you can apply a thin coat of clear sealer for general protection. Apply it in a well-ventilated area, let it dry according to the label, and let the sealed letters cure fully before hanging them.
Hanging methods: Unpainted wooden letters do not come with hanging hardware, so choose a method that matches the letter's weight and your wall. Removable adhesive strips are one option; the wood letters in this shop are not sold with them.
Wall safety: Keep hanging hardware, small nails, and adhesive strips out of reach of children, and check the letters periodically to make sure they are still secure. If you are unsure about your wall type, a local hardware store can recommend the right anchor for drywall, plaster, or masonry.
For more on keeping nursery decor safe, you can review guidance from the [U.S. Consumer Product Safety Commission | cpsc.gov].
Ready to create a nursery that feels truly personal? Browse our unfinished wood letters and start painting your child's name today. At Painted wood letters, we love helping families make their nursery feel magical.
Frequently Asked Questions
What kind of paint should I use on wooden letters?
Acrylic or craft paint works well on wooden letters because it goes on smoothly, dries quickly and comes in a wide range of colors. Choose a water-based paint for a nursery, since it has less odor than solvent-based options. Two to four thin coats usually give even coverage on unfinished wood. Let each coat dry fully before adding the next, and seal the finished letters with a clear topcoat to protect the paint from scuffs.
Can I paint directly on wood without primer?
You can paint unfinished wood without primer, but a light coat of primer or a sanded, dust-free surface helps the paint adhere evenly and reduces the number of coats you need. Raw wood absorbs paint unevenly, so the first coat may look patchy. Apply a thin primer coat, let it dry completely, lightly sand, wipe off the dust, and then paint. This extra step produces a smoother finish, especially on lighter colors.
How should I seal painted wooden letters?
Seal painted wooden letters with a clear, water-based acrylic sealer once the paint has cured. Apply one thin coat, let it dry, and add a second coat for extra protection. Sealing helps the letters resist fingerprints and light scuffs, which matters in a nursery where they are handled often. Check that the sealer is labeled suitable for children's items before you use it, and allow the letters to dry thoroughly before hanging them.
