


Last Updated: November 18, 2026
Quick Summary
To protect painted wood from scratches, apply two to three thin coats of a water-based polyurethane sealer once the paint has fully cured for at least 24 hours. The clear film takes the wear instead of the paint, blocking scratches, moisture, and UV fading.
- Wait at least 24 hours for acrylic paint to cure before applying any sealer.
- Lightly sand with 400-grit between coats so the finish grips and cures evenly.
- Water-based polyurethane needs about 24 hours to feel dry and several days to fully harden.
- Dust with a soft, dry cloth and lift letters rather than sliding them across shelves.
- Mod Podge is softer than polyurethane and can stay tacky in humid rooms.
Table of Contents
- Why Hand-Painted Wooden Letters Need a Protective Finish
- Choosing a Protective Sealer for Painted Wood
- How to Seal Painted Wood Crafts: Step-by-Step
- Mod Podge Sealer for Painted Wood: When It Works and When It Doesn't
- Everyday Habits That Protect Painted Wood from Scratches
- How to Repair Scratches on Painted Wood Letters
- Order Your Custom Painted Wood Letters Today
- Frequently Asked Questions
Why Hand-Painted Wooden Letters Need a Protective Finish
A hand-painted wooden letter is a small piece of art, and like any art, it needs a shield. Paint sits on the surface of the wood, not inside it. Every brush, wipe, and grab wears at that layer. At TheFairyPaintBox, we seal the letters we paint with a clear finish to help protect the paint.
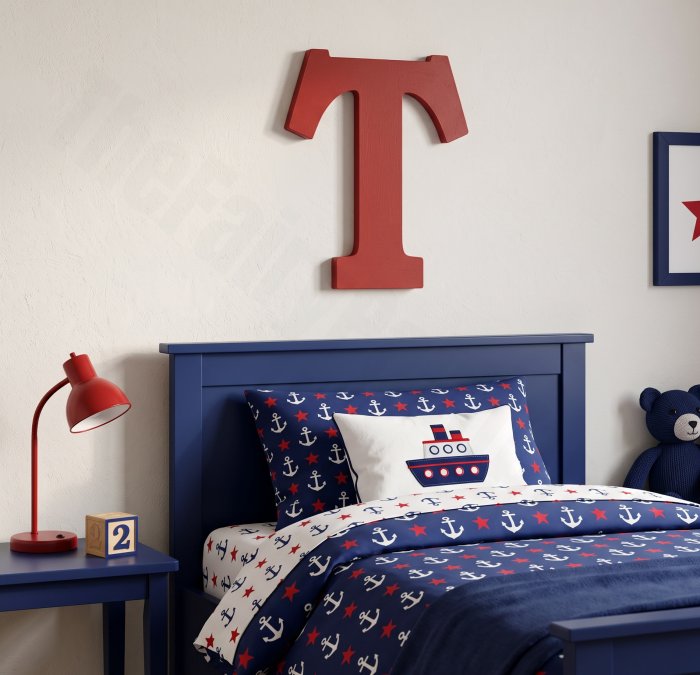
Here is the simple truth. A protective sealer for painted wood is a clear coating applied over dry paint to block scratches, moisture, and UV fading. It sits on top, takes the wear, and lets the artwork underneath stay untouched.
Why does bare paint fail so fast?
- Acrylic paint dries to a thin, slightly porous film
- Dust and oils from fingers cling to that film
- Wiping a dusty letter grinds grit across the paint
- Sunlight slowly fades bright pigments
- Moisture swells the wood and can lift paint at the edges
Nursery letters face all of this. A toddler's toy flies across the shelf. A damp cloth wipes the name sign. Afternoon sun hits the wall for hours. None of these are dramatic. Together, they dull a finish quickly.
The good news: protecting hand-painted wooden letters from scratches takes only a few simple steps. Below, we walk through the sealers that work, the steps to apply them, and the daily habits that keep paint looking new.
Choosing a Protective Sealer for Painted Wood
Picking a sealer comes down to three things: how the letter will be used, whether the finish must stay crystal clear, and how much abrasion the surface will face. There is no single best choice for every project, but scratch resistance should drive the decision more than sheen or brand.
Here is how the main options compare for a painted wood sign, with scratch resistance called out specifically:
| Sealer Type | Finish | Scratch Resistance | Best For | Watch Out For |
|---|---|---|---|---|
| Water-based polyurethane | Clear, satin to matte | High once fully cured | Indoor letters, most nurseries | Can raise grain on first coat; needs two to three thin coats |
| Solvent-based polyurethane | Warm amber tint | Very high; hardest film | High-traffic pieces, handled letters | Strong fumes, longer cure, can amber over time |
| Brush-on varnish | Clear to gloss | High | Detailed raised letters | Brush marks if applied thick; sand between coats |
| Spray sealer | Even, thin | Moderate; build several passes | Recessed letters, small pieces | Needs several light passes; easy to under-apply |
| Mod Podge | Matte to gloss | Low to moderate; softer film | Light indoor use, decorative pieces | Can stay tacky in humidity; fingernails can mark it |
A few rules of thumb we follow in our studio:
- For indoor nursery letters, a water-based polyurethane in satin or matte is our pick. It stays clear, dries fast, resists yellowing, and builds a film hard enough to shrug off fingernails and toy edges once cured.
- For pieces near a window, choose a sealer labeled UV-resistant. Sun is the quiet killer of bright paint, and UV blockers also slow the chalking that makes a clear coat look dull.
- For raised or recessed lettering, a spray sealer reaches the tight spots a brush cannot, but build it in several light passes rather than one wet coat so it cures evenly.
- For a matte, chalky look, test a matte varnish on a scrap first. Some matte finishes soften color slightly and offer less abrasion resistance than satin.
One more thing most guides skip: compatibility. Water-based sealers work over acrylic paint without trouble. Solvent-based sealers can lift or wrinkle some acrylics if the paint is not fully cured, and they can react with markers or hand-lettering inks. Always test on the back of a letter before coating the front. A common pattern is to apply one thin coat, wait the full recoat window on the label, then check for cloudiness or lifting before committing to the front.
How to assess scratch resistance without lab equipment: press a fingernail into an inconspicuous spot after the finish has cured. A hard film resists the nail and feels slick; a soft film dents or feels tacky. Most practitioners find that two to three thin coats of a water-based polyurethane outperform one thick coat of varnish for everyday handling, because thin coats cure harder and more evenly.
Want a closer comparison of application methods? Our guide on spray versus brush-on sealer for wood letters breaks down the trade-offs.
How to Seal Painted Wood Crafts: Step-by-Step
Sealing is simple, but the details decide the result. Rushing any step shows up later as streaks, bubbles, or a cloudy finish. The steps below add the timing and handling cues most guides leave out.
What you'll need:
- Your fully dry painted letters
- 220-grit and 400-grit sandpaper
- A clean, damp cloth
- Painter's tape or pinstriping tape
- A soft brush or a spray sealer
- Your chosen clear coat
- A dust-free work surface
Step 1: Let the paint cure completely. Acrylic paint feels dry in under an hour but keeps curing for days. Wait at least 24 hours before sealing, and longer in humid conditions.
Step 2: Sand lightly. Run 400-grit sandpaper over the painted surface with a light touch. This knocks down bumps and gives the sealer something to grip. Skip this and the coat can peel.
Step 3: Clean off all dust. Wipe the letter with a clean, damp cloth, then let it dry fully. Dust under a clear coat shows as grit forever.
Step 4: Tape off what you want to keep bare. Mask any unpainted wood, hanging hardware, or areas where two colors meet. Pinstriping tape bends around curves better than standard painter's tape.
Step 5: Apply thin, even coats. Brush or spray a light coat in one direction. Thin coats beat thick ones every time. A heavy coat pools, drips, and dries unevenly.
Step 6: Let it dry, then recoat. Follow the drying time on the label. Lightly sand with 400-grit between coats for a smoother finish.
Step 7: Cure before hanging. The coat feels dry long before it is fully hard.
A practical handling test: after the recommended cure time, press a clean finger into an inconspicuous spot. If it feels slick and leaves no print, the finish is ready for light handling.
For a deeper walkthrough on avoiding smears and streaks, see our guide on how to seal painted wooden letters without smearing.
Mod Podge Sealer for Painted Wood: When It Works and When It Doesn't
Mod Podge is the sealer most crafters reach for first. It is affordable, water-based, and easy to brush on. It also has real limits on painted wood.
Where it works well:
- Light indoor decor that rarely gets touched
- Matte or gloss finishes over acrylic paint
- Quick projects where you want one product for sealing and gluing
- Decorative pieces kept away from heat and moisture
Where it falls short:
- Humidity. Mod Podge can stay slightly tacky in damp rooms. Two letters pressed together may stick.
- Scratch resistance. It is softer than polyurethane. A fingernail or toy edge can mark it.
- Re-coating. A second coat can reactivate the first and turn cloudy if applied too heavily.
Mod Podge sealer for painted wood can suit a decorative sign that hangs out of reach. For a name sign above a crib or a letter a child will touch, a polyurethane or varnish finish is generally a sturdier choice.
If you do use Mod Podge, apply several very thin coats and let each one dry fully. Test the back of a letter first to confirm the finish stays clear over your paint.
Everyday Habits That Protect Painted Wood from Scratches
The best sealer still needs good habits behind it. Handling is a common cause of scratches on painted wood.
A few simple routines go a long way:
- Dust with a soft, dry cloth. Skip paper towels and rough rags, which act like fine sandpaper.
- Never scrub. A damp cloth with a light touch handles most marks. Scrubbing grinds grit into the paint.
- Lift, don't slide. When moving a letter, pick it up. Sliding it across a shelf scratches the back and edges.
- Keep letters off high-traffic surfaces. A shelf above the crib beats a low shelf within a toddler's reach.
- Rotate sun exposure. If a piece sits in direct sun, shift it now and then to slow fading.
- Store spares carefully. Wrap loose letters in tissue or a soft cloth so they don't rub together.
For letters headed outdoors or into a humid room, extra protection matters. Our guide on how to waterproof painted wood letters for outdoor use covers the steps.
Thinking about the paint layer itself? The right paint holds up better from day one. See what paint works best on wooden letters.
How to Repair Scratches on Painted Wood Letters
Small scratches happen, even with care. Most are fixable at home in a few minutes.
Match the fix to the damage:
- Shallow surface scuff: Rub the area gently with a soft cloth. Often the mark is on the sealer, not the paint.
- Light scratch through the clear coat: Apply a thin coat of the same sealer over the spot. Let it dry and blend.
- Scratch showing bare wood: Touch up with matching acrylic paint using a fine brush. Let it cure, then reseal the area.
- Deep gouge: Fill with a tiny amount of wood filler, sand smooth once dry, repaint, and reseal.
A few tips from our studio:
- Keep a small note of the paint color and sealer you used. Matching later is far easier.
- Always reseal a touched-up spot. Fresh paint has no protection.
- Test any touch-up on the back first to confirm the color match.
Order Your Custom Painted Wood Letters Today
Our hand-painted pieces are made to order, with free preliminary sketches so you can see the design before we paint. Each letter is made from sturdy wood and finished by hand in the colors and fonts you choose.
Browse our white stand-alone painted wood letters to start your set, or message us for a custom name sign.
Frequently Asked Questions
How long should paint dry before sealing wooden letters?
Acrylic paint on wooden letters needs to cure fully before you apply any sealer. Most acrylics feel dry to the touch within an hour, but they continue curing for up to 24 hours. Waiting a full day gives the paint time to harden so the sealer bonds evenly and does not trap moisture. If you are working in a humid room, add extra time. Rushing this step can cause cloudy patches or peeling later.
How many coats of sealer should you apply to painted wood?
Two to three thin coats are standard for hand-painted wooden letters. Apply the first coat lightly, let it dry according to the product label, then add the next. Thin layers dry more evenly and resist yellowing better than one heavy coat. For letters that will be handled often or displayed in a child's room, a third coat adds extra scratch resistance. Always let the final coat cure fully before hanging or storing the letters.
Is Mod Podge a good sealer for painted wood?
Mod Podge works well as a sealer for indoor painted wood crafts, especially when you want a matte or satin finish. It dries clear and is easy to apply with a brush. However, it is water-based and can become tacky in humid conditions, so it is not the best choice for pieces that will be handled frequently or exposed to moisture. For nursery letters that stay on the wall, Mod Podge is a practical, affordable option.
How can you prevent wooden letters from getting scratched during storage?
Wrap each letter individually in acid-free tissue paper or a soft cloth before storing them in a padded box. Avoid stacking letters directly against each other, since painted edges can rub and chip. Stand them upright if possible, or place a layer of foam between each piece. Keep the box in a dry, temperature-stable area. If you are storing letters between children or seasons, label the box and avoid placing heavy items on top.
